Cure an oven — why, when, how
comment : 0
My week has been dominated by water, rain, and discussions on how, why and when to cure an oven. Here in Austin, we’ve had successive weeks of record rain, rapid river risings, water warnings, and historic flooding. At this point we’re under a city wide boil-water notice with headlines warning that if the rain keeps falling, we could run out of water. My brain is cycling on Coleridge’s lines from The Rime of the Ancient Mariner,
“Water, water, every where,
And all the boards did shrink;
Water, water, every where,
Nor any drop to drink.”
Questions about curing an oven
This week I have fielded calls from new customers, existing customers, potential customers, and far-flung blog readers asking about wet ovens. Will this much rain damage my oven? If I see water dripping off of my oven is it damaged? If my curing fire got a little bit too hot am I sunk? Should I light a fire while it’s raining? Not light a fire while it’s raining? Good questions. We have a blog on how to cure an oven after it has been built. We have another blog (with more photos) on the need to periodically cure an oven that has stood unused, or has been in the rain for a few weeks without a firing. Still, there is more to cover on this whole curing business.
Silver lining for local restaurants
At the same time, I’ve been following posts from our commercial customers. Places like Barley Swine, Odd Duck, Parkside, Jack Allen’s Kitchen, Stella have adjusted their operations to comply with City of Austin guidelines. They have handled the logistics of boiling water, changing up their menus, and figuring out what to do about all that ice we normally take for granted: ice for fountain drinks, ice for signature cocktails. How do we function without ice in Texas? As owners deal with our dual problem of too much and too little water, none of our Austin restaurant owners or bakers called to ask about their ovens. Yes, they’re professionals. But their ovens are usually inside or used daily — often both. Indoor ovens always have enough heat in them to stay dry and efficient, protected from the stress of extreme thermal cycling. They are not likely to have accumulated too much moisture.
Why is there moisture in the masonry?
Whether built by hand on-site or manufactured in a factory, wood-fired ovens are constructed using lots of water. Bricks are soaked, mortars and cements are made with water. The entire process involves mud; shaping something while it is still wet (like shaping your dough before you bake it) and then heating it to set the structure, drive out moisture, and lock chemical bonds. This is why the very first time you cure your oven after manufacture (the initial cure) is so critical. Residual moisture from the construction process needs to be gradually driven out of the masonry to set everything in place and protect the materials from breaking.
An initial cure is just the beginning. Masonry materials are porous and will absorb water when they are dryer than the environment around them. Different masonry materials are rated by how porous they are. (If you want to buy the abstract from Springer Link you can learn even more about porosity and density specifically of firebricks. Check out Porosity–density relations in stone and brick materials.) For our purposes, it is enough to know that the bricks and clays appropriate for wood-burning ovens are technically refractory materials. I like this definition from Encyclopedia Britannica:
“Refractory, any material that has an unusually high melting point and that maintains its structural properties at very high temperatures. Composed principally of ceramics, refractories are employed in great quantities in the metallurgical, glassmaking, and ceramics industries, where they are formed into a variety of shapes to line the interiors of furnaces, kilns, and other devices that process materials at high temperatures.”
Refractory: high tech for an ancient “appliance”
Unlike historical ovens, today’s ovens (built with fireclay materials) should last for decades without major chipping or cracking. Refractory ovens have superior heat retention and conduction. When oven manufacturers extol the technology of their oven materials, they are talking about the benefits refractory materials have over traditional bricks or natural clay. Fireclay (whether fashioned into bricks or formed into 3D-puzzle-like piece for an oven kit) contains a carefully engineered mixture of aluminosilicate and silica. Fireclay properties vary with the manufacturing process, particle size, and aluminum-to-silica ratios but as a class these products share some important characteristics:
- a high melting point.
- fair resistance to corrosive materials and gases.
- resistance to physical wear.
- resistance to abrasion.
- resistance to thermal shock.
The proper ratio of aluminum and clay, with particles of the right size, combined under the correct amount of pressure, and fired at a temperature that will lock chemical bonds yields a super-hero building material for wood-burning ovens. Fireclay absorbs heat quickly, transfers it efficiently, and (with proper insulation) holds it effectively. This depends on balancing strength and porosity.
Porosity: there’s your problem
The porosity of fireclay material is key to its resilience against thermal shock. When it comes to the bricks in your oven vault, some porosity is like Jack Nicholson in “A Few Good Men,”
“You want me on that wall. You need me on that wall.”
But like Colonel Jessup, there’s more to the story. Fireclay materials are designed to absorb. And they do! When dry, this allows them to handle rapid temperature changes without cracking. Which leads us back to why we need to cure an oven. When wet, fireclay loses some of its characteristic strengths. It becomes susceptible to thermal shock and inefficiency when it comes to absorbing and transferring heat.
What does it mean to cure an oven?
One definition for “curing” on merriam-webster.com is “to prepare or alter especially by chemical or physical processing for keeping or use.” The most familiar example is salt-curing food to preserve it. Dehydrating meat by curing it is arguably the oldest form of meat preservation. Ancient people of all cultures used salt, sugar, and smoke to cure meats in order to store them safely. Similarly, curing an oven is a process to draw out excess moisture and maintain the effectiveness of the oven.
To cure an oven, you use heat to slowly drive out excess moisture. This is not unique to wood-burning ovens. I fell into an interesting rabbit hole reading about how giant oven manufacturers (walk-in ovens, conveyor belt ovens) cure their ovens. Proper heat is critical in curing their powder coating. It reminded me that owning a wood-burning oven puts you in touch with things we take for granted in off-the-shelf appliances (where a manufacturer does them for us once and it is done). With experience you come to “just know” when the oven is the right temperature for pizza, or when you’ll need to watch those tender veggies, or allow a bit more time for that roasted chicken… you come to know when you should cure an oven again.
Know when to cure an oven
My oven has been unlit for about 10 days. Normally, I wouldn’t think twice about building a fire, adding plenty of wood and letting the temperature build quickly. I’d be cooking in an hour or so, maybe sooner depending on what was on the menu. After our incredible rain fall, I inspected my oven yesterday in preparation for cooking this weekend. The exterior stucco is drenched (like everything else in my backyard). When I took off the door, I saw dark patches spreading over parts of the vault. I had burned the oven clean previously, so this looks like accumulated moisture. Here are some things to notice. They can signal that you need to bring your oven up to temperature slowly or fully re-cure it:
- It has been a long time since you fired the oven.
- It has been raining a lot and your oven is out in the open.
- The inside of the oven feels dank or damp when you remove the door.
- The ash you remove feels heavy on the peel or damp to the touch.*
- The inside of the oven looks darker than usual or has dark patches.
- The work surfaces around the area have accumulated water.
- The oven feels “sluggish” producing heat or gets “stuck” at a low temperature.
*This is my new justification for not cleaning out my oven immediately after use. I’m using the ash to gauge moisture!
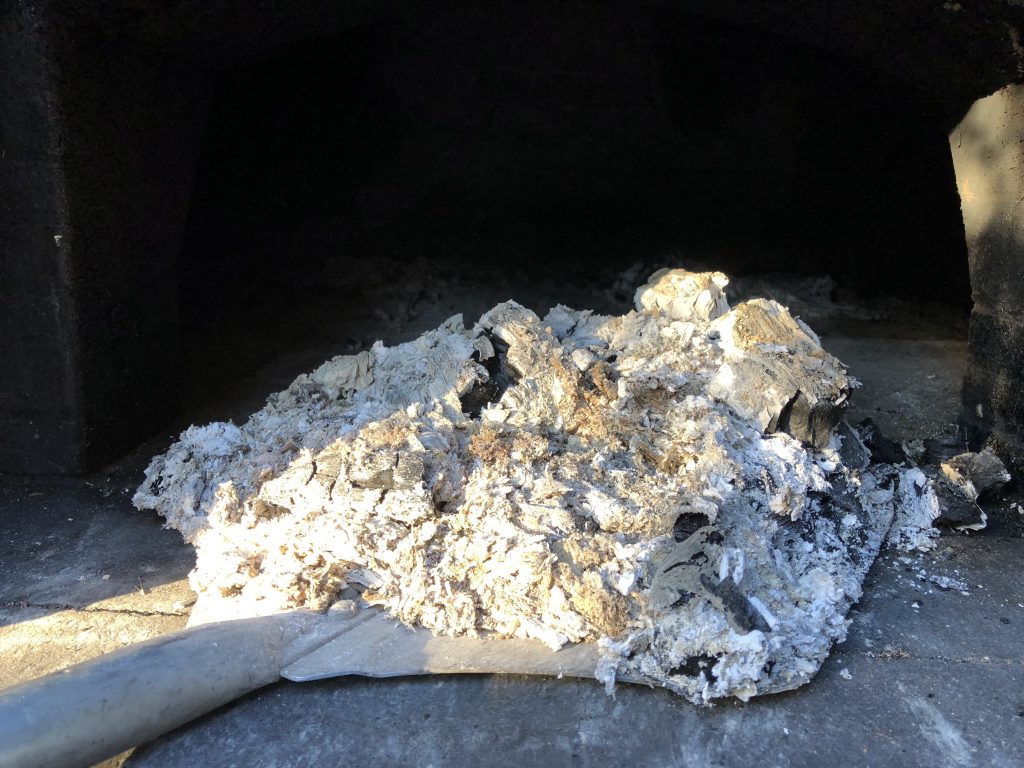
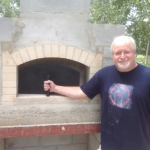
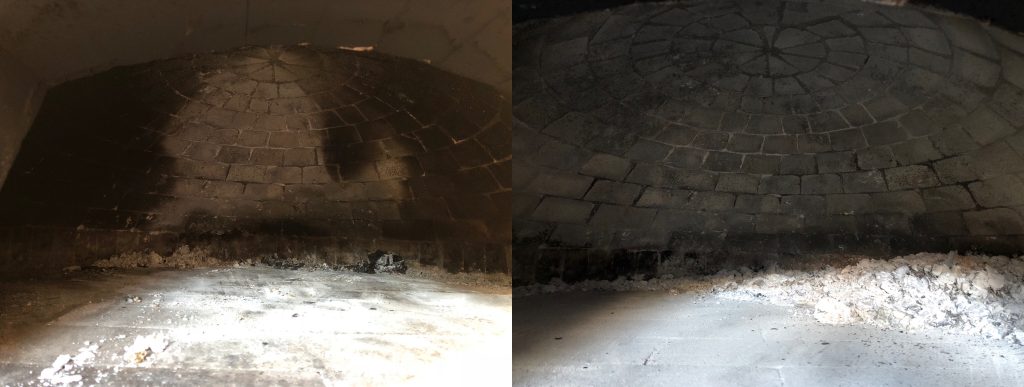
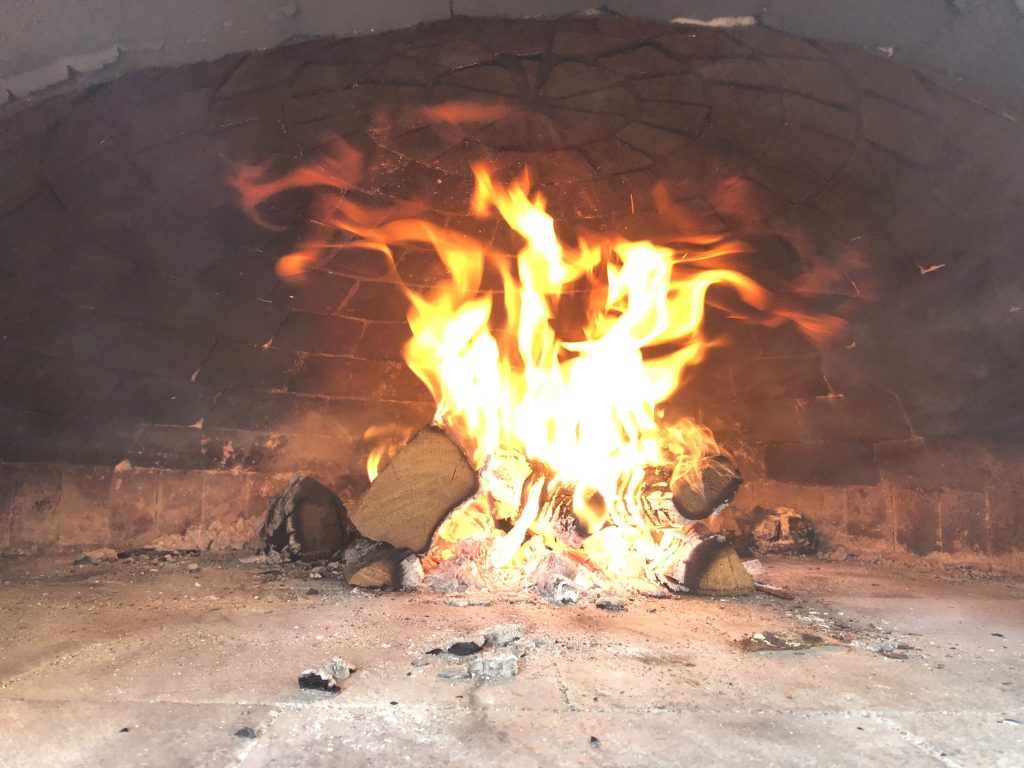
Yesterday, my oven matched several of these indicators. To me, that meant I needed to budget a little bit of extra time today. Rather than waiting until just before dinner to fire my oven, I started a mini re-cure this morning. In the photo on the left below, you can see how it looked once I cleared out the damp ash. Notice the dark patches that indicate moisture. By comparison, on the right the bricks look clean and clear.
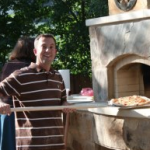
As I was picking up work on the blog this morning, one of our customers reached out with questions about curing his oven! Perfect timing. That was all I needed to grab my propane wand and start snapping photos.
I probably could have started later in the day, but when in doubt, cure! Cure early! If you have an important party planned, or it has been more than a few weeks since you used your oven, err on the side of caution. Light the oven a couple of days in advance and enjoy a casual wood-fired weeknight dinner. This one step will ensure your oven heats up quickly and performs well when you’re hosting.
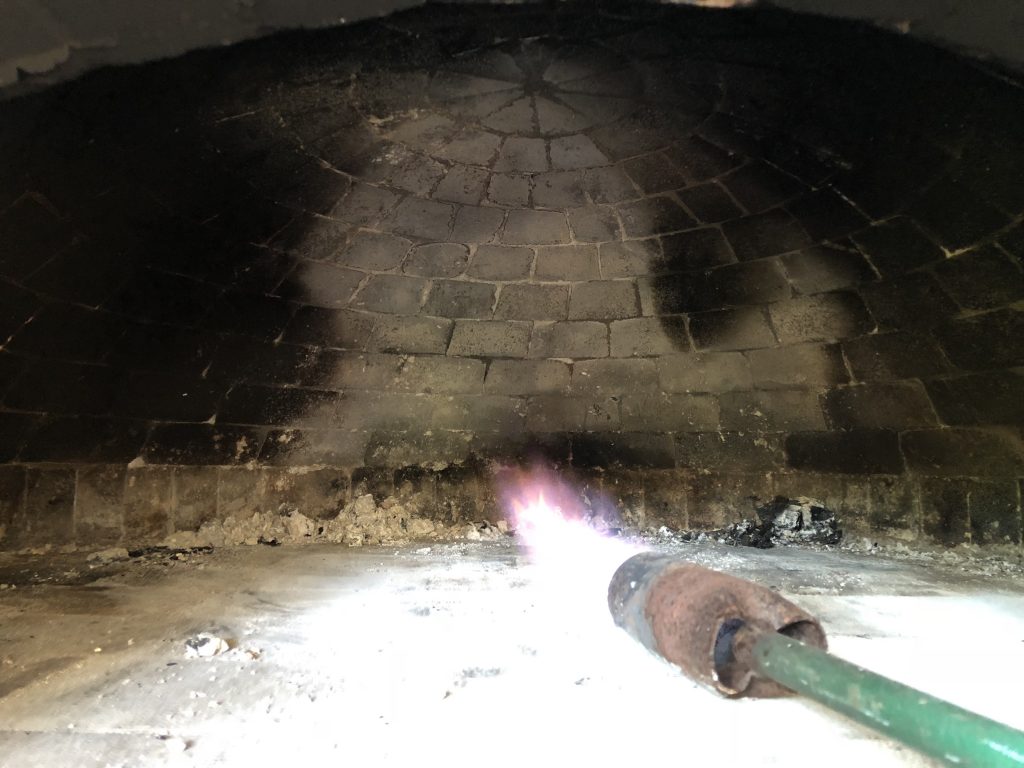
After half an hour of low steady heat from the propane wand, you can see the lighter patches (at the top of the dome, and down the center back) have already begun to lighten even more. They were the driest parts of the vault to begin with, and quickly transitioned back to “normal” color.
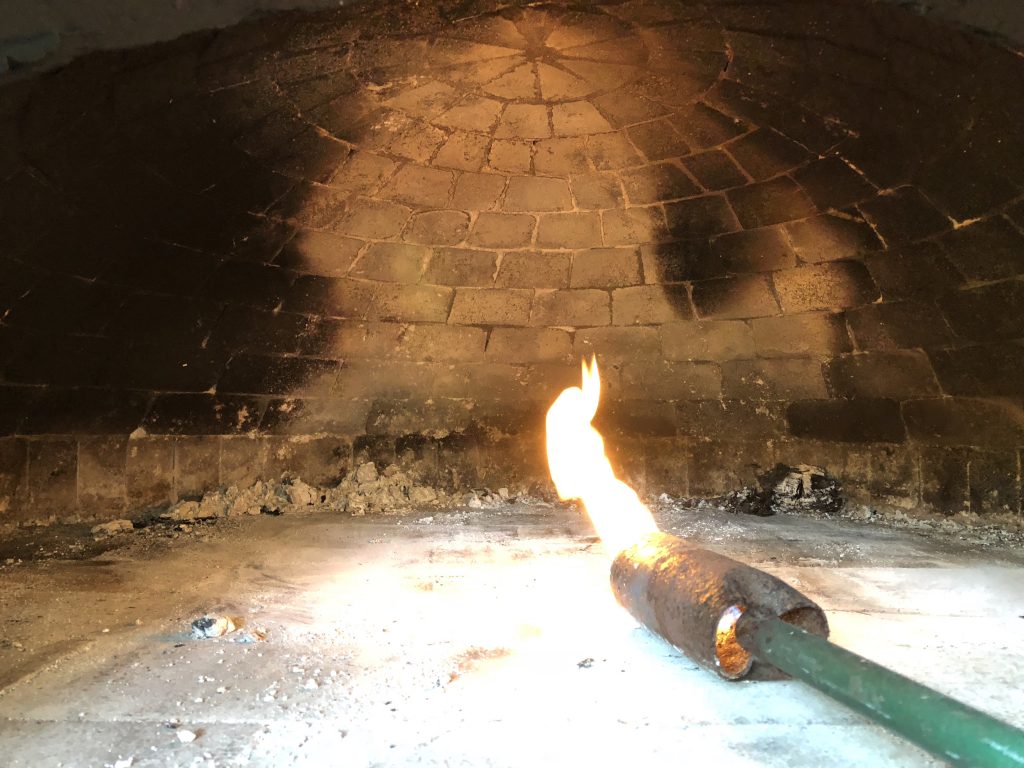
I burned the propane wand a bit longer before building a very small fire. In part, I did this in order to preserve visibility for these photos. The oven vault can look dark because it is damp, or because it is covered in soot (or both). By about 9:15 (so not quite an hour) you can see that more moisture has evaporated and the dark patches are shrinking. I usually burn my oven about once a week, so if it has been longer since you cooked in yours, allow more time.
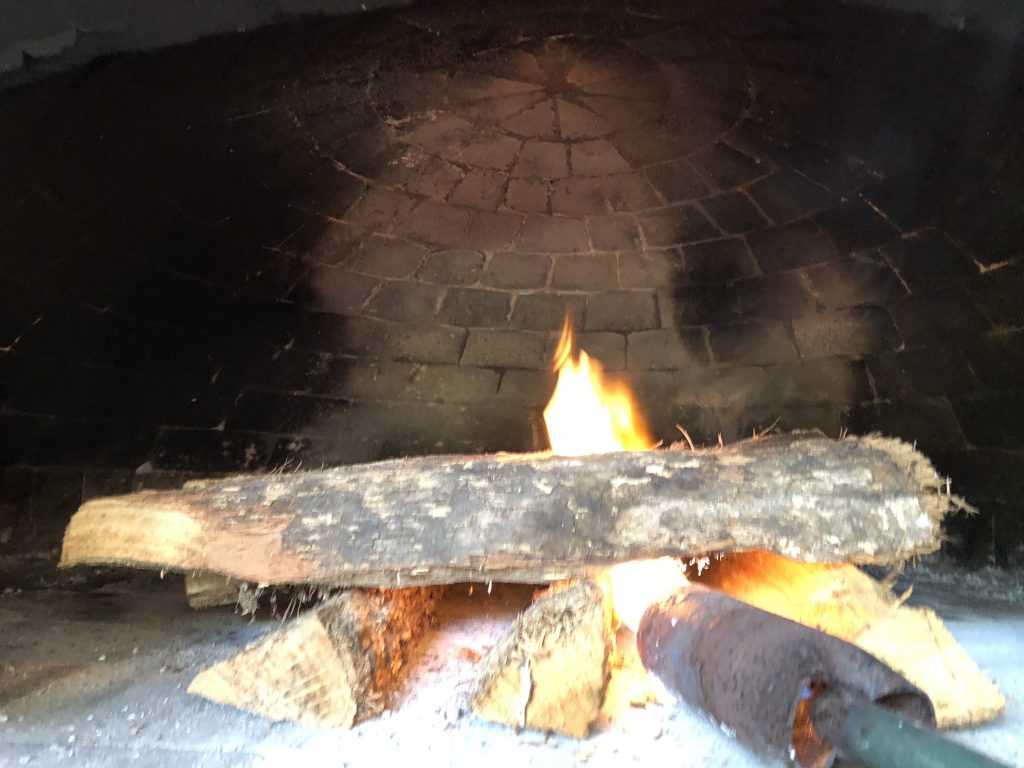
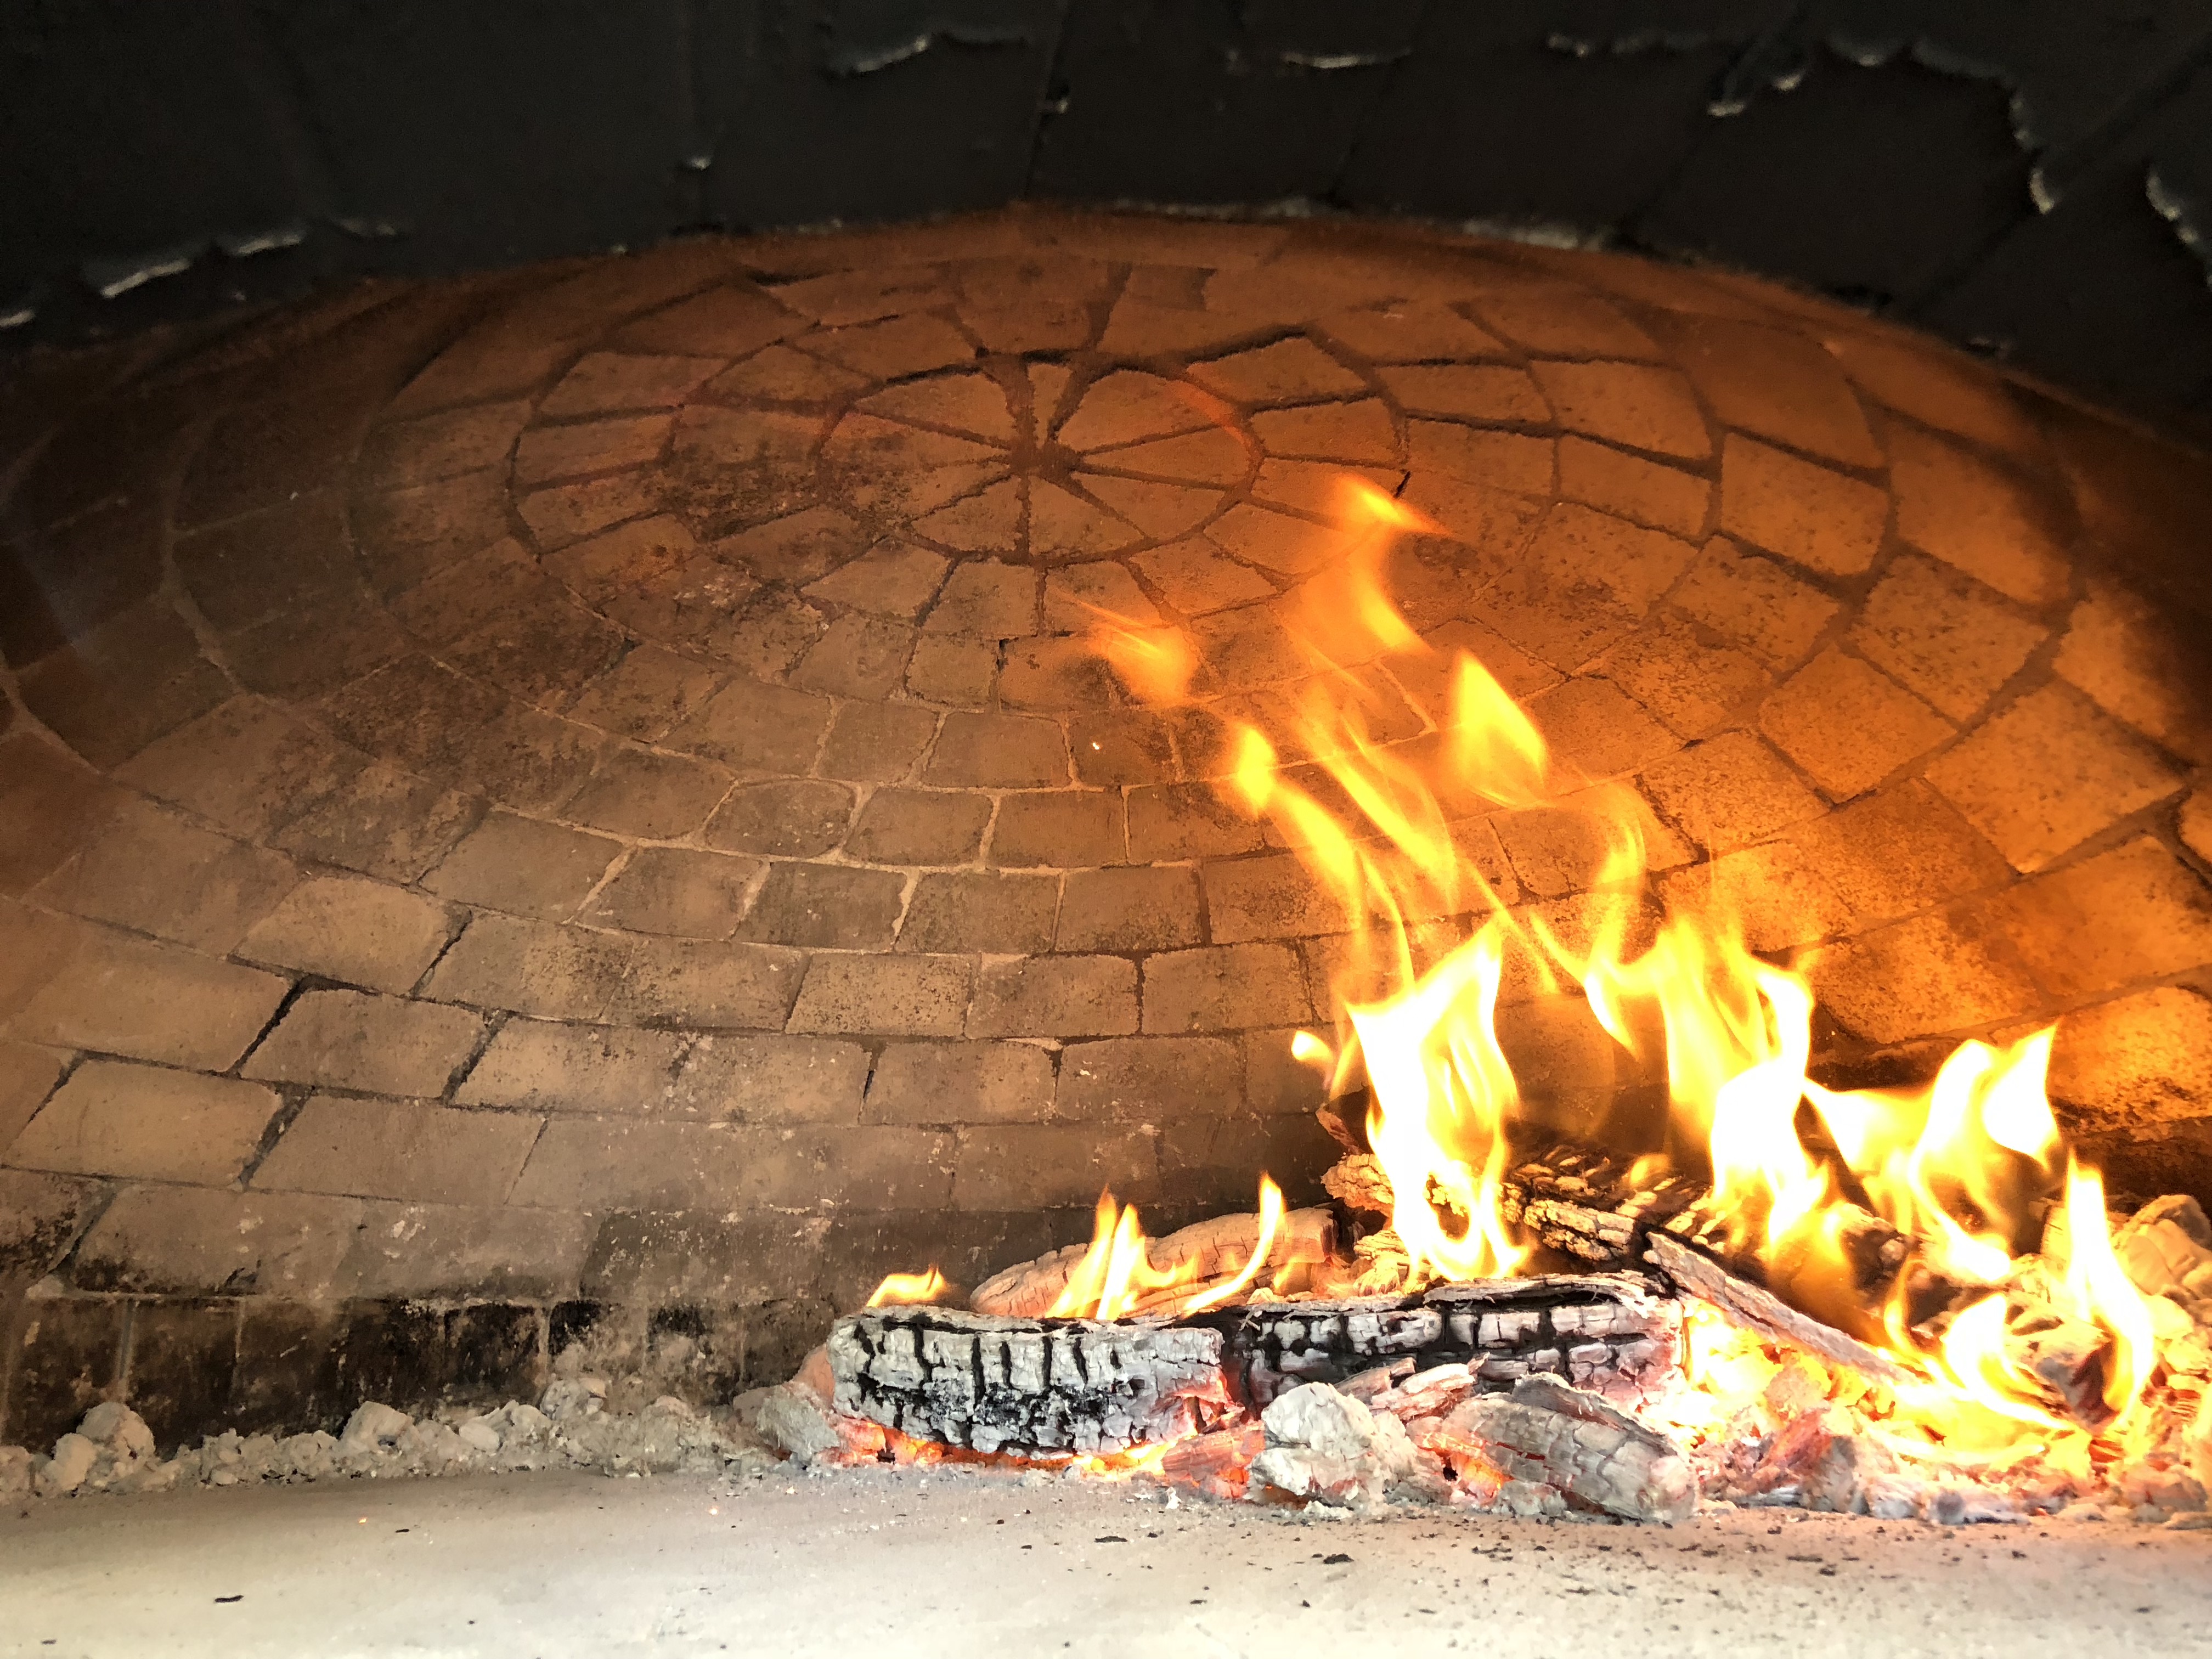
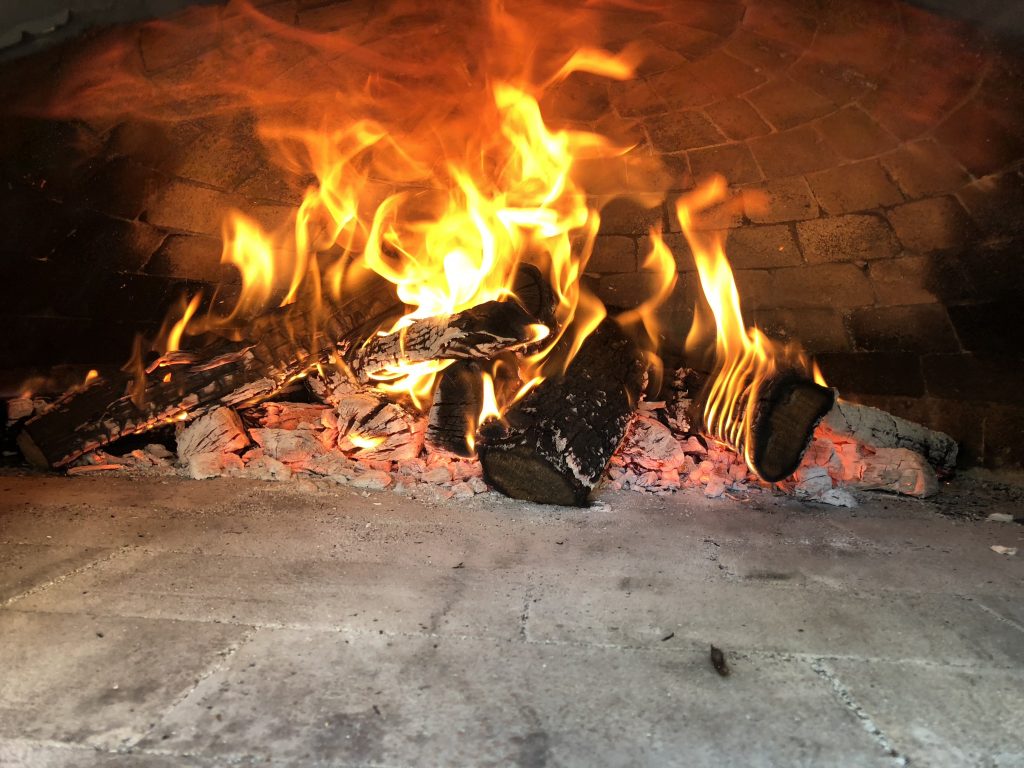
At this point, it was time to add wood. You can see the change in visibility in the following photos. As the fire gets going, the vault will initially look darker than it did at the beginning. This is normal. The fire deposits soot on the oven vault, but it will soon burn off that soot too.
I periodically added wood, letting the fire get established and burn down a bit in between each addition. After about an hour and fifteen minutes, I went ahead and added more wood at once to heat up the fire. Immediately the soot started to burn off as the dome took on heat.
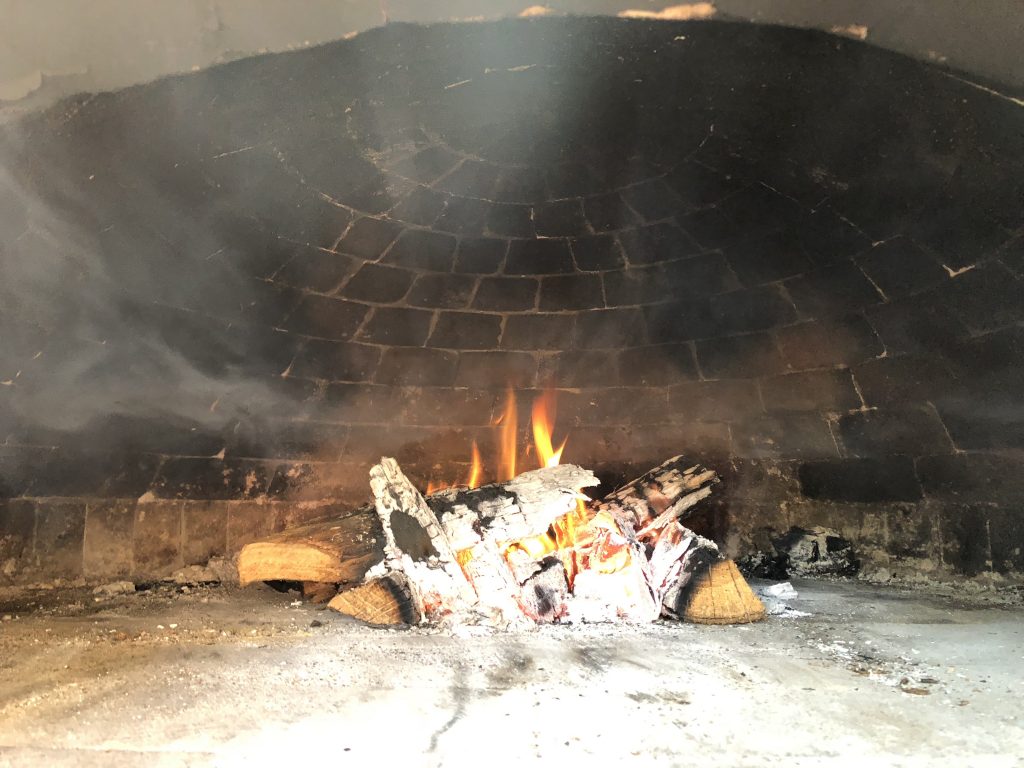
Watching for the soot to burn off is a key to properly curing your oven. First the top of the dome will clear to a clean light color. Then that clear patch will expand, working down the sides of the vault. In the photo below, you can see that much of the soot and moisture has burned out. The right side is mostly clear with moisture only along the floor joint. The left side has a larger patch of moisture still visible. Keep the fire burning.
You may have noticed that part way through here I pushed the fire back. I built the initial small fire close to the mouth of the oven. Once it was well established, I used my oven brush to push it back deeper into the vault. Lighting the fire near the front maximizes oxygen flow to get the fire going.
Pushing the fire back takes advantage of natural convection to distribute heat. As you can see below, the fire draws cool air in from the mouth. As the air heats and rises, it follows the curve of the vault until it is forced down in order to escape out of the top of the opening. This distributes heat throughout the oven. At this point you can also move the fire from one side to the other.
To cure an oven is to protect it
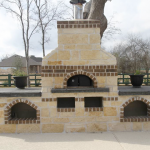
As the root “cure” implies, this is a restorative technique. My oven is more than seven years old with zero maintenance other than cleaning out the flue, because I take care not to throw wood in against the bricks and to cure the oven as needed. It’s probably time for a bit of a touch up on the exterior stucco and possibly the insulation, as it looks like a bit more moisture is accumulating around the bottom edge where the oven meets the surrounding work surface. That’s a topic for another blog. Functionally it is still impeccable, and I’m attached to its well-loved look. In the image below, the vault is nearly clear with only a few dark patches around the perimeter and speckles of soot on a few bricks.
If this is the first time you’ve cured your oven, take it all the way to pristine before cooking. There can be residual chemicals from manufacturing present during the first cure. If this is a maintenance cure or a regular firing taken a bit slowly for safety’s sake, take advantage of this heat to do some cooking.
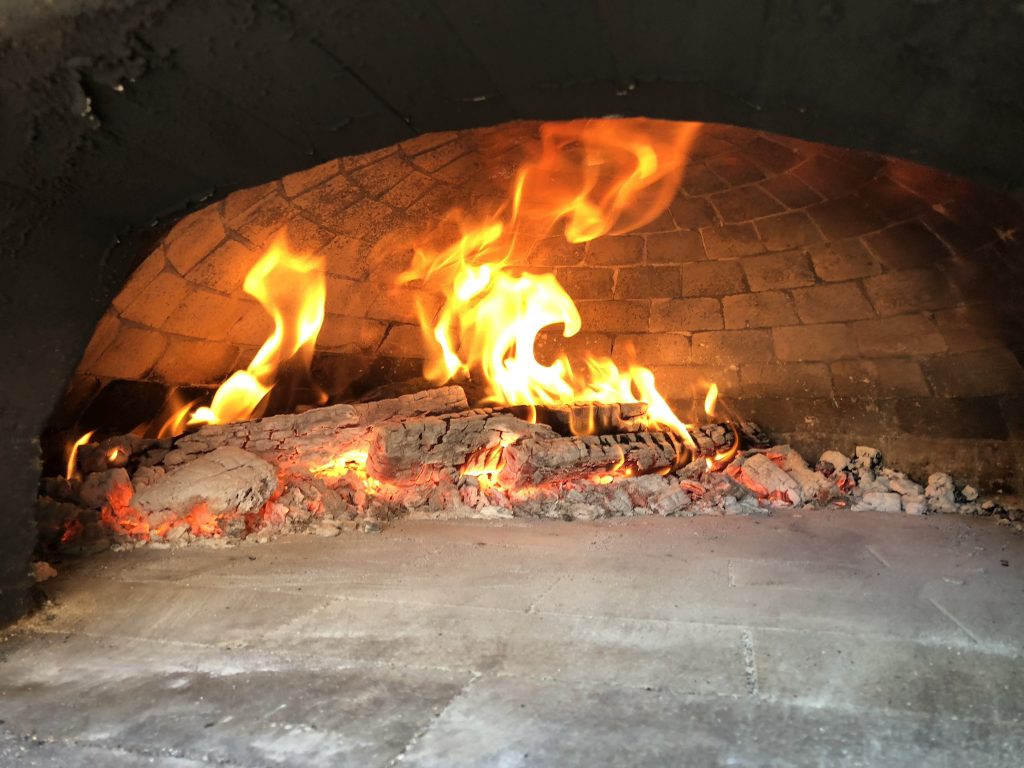
In the photo below, my oven vault is beautifully clear again, light and clean. It is also burning more efficiently. With only tiny additions of wood it is hovering around 750° and burning without smoking. As long as I use it regularly, it will stay cured: heat up quickly, maintain high temperatures, and stay dry.
I spent an extra hour and a half maybe two hours to slowly fire up the oven this morning. It was worth it. After all these years, my vault still looks beautiful, free of chips and cracks. The simple precaution, taking the time to cure an oven periodically, will extend your oven’s beauty and longevity.

Ovens on a steel base
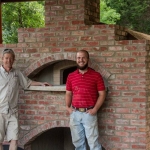
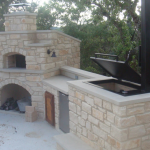
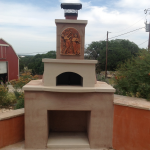
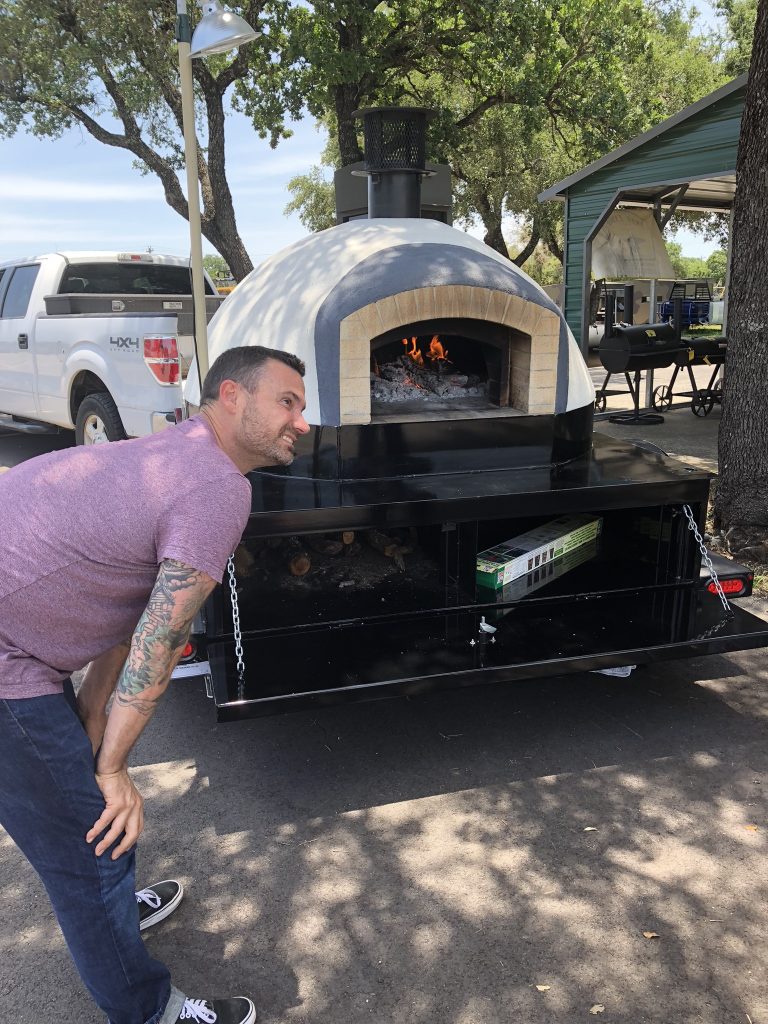
It’s too late to make this blog short, so I might as well throw in a word about ovens built on a non-porous base. The metal stand oven has become increasingly popular. It’s a great option for restaurant owners who might have to change locations one day and don’t want to lose their beautiful oven. It is also a great option in areas where there is a view. One of the first stand ovens we did for a residential installation was for a customer with beautiful home on Lake McQueeney. He did not want to settle for a tiny oven, but also wanted to preserve his view of the lake.
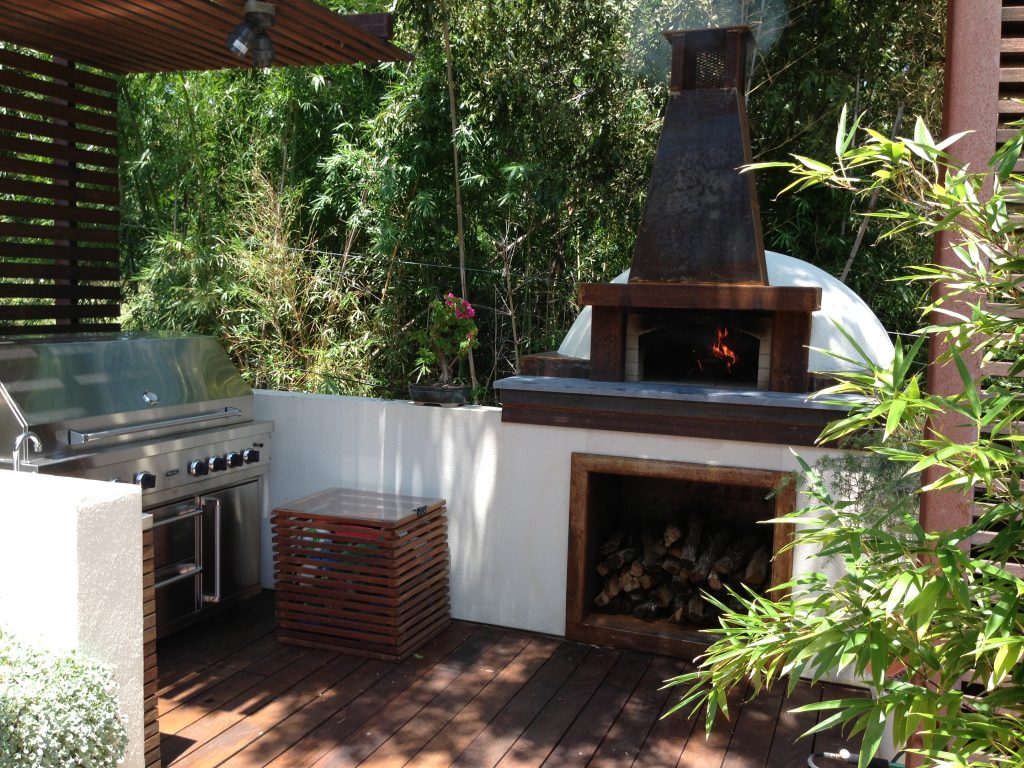
Mobile ovens are another good example of an application where a porous masonry oven is installed on a non-porous base. Even when perforated with weep holes to facilitate drainage, ovens built onto a steel plate are going to collect more moisture on the oven floor than ones built on masonry (read porous) hearths slabs. Allow more time to cure an oven on a steel stand. Also, expect to cure an oven with a metal base more often than one on a masonry base.
 You can sometimes see moisture dripping off the base as the curing flame drives moisture out of the firebrick. This is not a problem. It’s a good thing! When I re-cure my oven at home whether the water evaporates or is driven out through the bricks and absorbed by adjacent masonry, I can’t see it. When you cure an oven on a steel stand, you can sometimes see the water dripping down the steel as the curing fire drives it out of the fireclay. This is what you want.
When it rains it pours
One final factor to remember (I promise) is that if your oven is wet, your wood might be too. I think we have more blogs on wood than on curing, so we’ve covered this topic in detail. The short version is that wet wood won’t burn. At least not well, not quickly, not hot, and not without smoking. Trying to cook in a damp oven while “burning” wet wood is frustrating. I fielded that call this week too. So, for the record, if you know your oven is damp make sure you have a full canister of propane and a stash of properly seasoned wood (preferably dry). Allow a little extra time, and enjoy a few extra moments watching a beautiful fire. It is worth it to cure an oven again.
Nostalgia, reality, and gratitude
Sometimes I find myself feeling nostalgic for a time I didn’t experience— a more simple life connected to the land, in touch with our historical roots. That yearning is part of why I love gathering friends and family around a fire, cooking locally grown food that I prepare myself. But, this week’s water safety crisis has reminded me of the many, many benefits we enjoy living where and when we do. While I’m happy to enjoy a kombucha or a glass of wine, I’m sure glad that we no longer depend on fermentation as the only guarantee of a safe drink. I’m enjoying the smell of freshly baked sourdough right now, but I’m thankful for the dishwasher that handles my mixing bowls.
As I was uploading my final photos to this blog, my phone rang. The caller was a nice guy from Vermont who had found our blog. He just had a quick curing question. It’s been an interesting week.
Here are some of those wood blogs I mentioned.
- How to Season Wood
- How to Source Wood
- Importance of Seasoned Wood
- How to Properly Add Wood to your Oven